
Branching out — Tips on expanding your mountain photography style
Part one of a two part essay on giving you tips and hints on how to take better shots and how to visualise potential photos differently. If you have ever felt bored by taking the same shots over and over again then this article may help you to break out of the mold and give you some new ideas…
Following on from my last article, Clare Danek (aka CJD) sent me this:
“I think it would be really worth you putting in a section about subject matter, just to get people thinking about not just trying to take the shot that recreates the ‘Mr X calendar’ (name deleted for obvious reasons) look – one of the things I like best about your pictures is that you’ve taken photos of some of the things that people might miss, the man sweeping the snow away from the platform at the Midi Station, that sort of thing, all of which are part of the alpine experience.”
Whilst I am definitely guilty of taking a lot of cheesy shots (how can you resist) there are times when I manage to get something a little different. I am certainly no ‘arty’ type so they dont come often and to be honest I’m a sucker for those beautiful sunset and mountain landscapes that get taken countless times and have no originality whatsoever. What I really wanted to write was a piece about composition and thinking ‘outside the box’ but those articles can be so lengthy and, well boring really. When I read a photography article I want it to be loaded with images so at least my eyes and brain get a reward every so often! Based on this I figured what better way than to pick 10 different images and explain BRIEFLY how I got them- if you’ve ever thought “I wonder how he got that…” (and I often do) then maybe these can inspire you to try new things.
Basics of branching out in mountain photography
If you want to get very experimental, one of the key skills is to not only have a good eye for composition but to know how to use your camera properly. If you are a bit unsure about how everything works then read this article on basic camera work in climbing, skiing and landscape work. If you want to go for the really ‘arty’ shots then a good knowledge of how to manipulate your camera is essential — however not all shots necessitate this and often a beautiful shot can be found just in front of you in tiny macro form and detail.
One of the main problems about photographing in the mountains is time… or more importantly, the lack of it. There are not many moments when you can stop and take photos without your partner hurling an ice axe towards you a few ‘photo stops’ later. Even as a keen photographer I can get very annoyed when individuals hold up the group because they want to take photos (oh the hipocracy!). At the end of the day you have to decide whether you are in the mountains to climb or to take photographs – I still havnt worked out which one I have decided on, but the one thing I know is that you cant do both 100%. When you are climbing flat out or find yourself in a desperate situation the last thing you are going to do is reach for your camera!
Of course here-in lies one of the great problems which is that some of the best photos are taken in those “Jon, whatever you do dont take a photo now” moments- its precisely in those moments of cold, unpleasantness and lets face it, quite often downright fear that a simple photo will capture what no staged photo will ever do- emotion, and bucket loads of it.
Thats one of the fantastic things about mountaineering photography – you dont have to be a techique wizard to achieve good shots. The mountains arent a fancy photo studio with glamorous models and perfect studio lighting, its an often inhospitable place with random lighting that is completely out of your control and unwashed bearded ‘models’ that are a far cry from the skinny meloncholy ‘twigs’ that parade down the catwalk (ok a bit harsh maybe!). To me the absolute key attribute that makes a good mountain photographer is commitment to taking a photo in even the worse scenarios — and that’s something anyone can do.
Of all the hundreds of mountain sport and landscape based photographers out there, to me, one i particular really stands out due to his brash commitment to taking photos that really exemplify ‘front line photography’. Ian Parnell has a special knack of producing some of the worlds most fantastic climbing and alpine images, not just because he is a very talented climber, but because when most would just get on with the climb and not touch the camera he has got it out; in fact he got it out 10 mins ago and he’s already loading another roll of film. Now, after all that showering of praise, I feel I can point out that Ian hasnt got the best technique in the world, infact in his own words “I feel like i’m a poor technical photographer but a good image maker”; and what better words of encouragement than that from one of the UK’s top photogrpahers? To be honest most mounatin photographers have poor technque as its easy to cover up any lack of technique with a beautiful scenery and composition- I myself only recently got swotted up on the subject and made a happy living from photography for 2 years blissfully ignorant of in-depth technical knowledge. I guess the point of this rather lengthy introduction is that you dont have to know your way around a camera back to front- you just have to put in the time and effort to get the shots…go that ‘extra mile’ that no-one else does.
Night Time Photography

Light Pollution reflected off the Mont Blanc and the Bossons Glacier
It’s got to be said, night time photography is some of my favorite kind. Whats really special about it is that when you do it right you can come back with an image that cant help but put a smile on your face. Best of all, all it requires is a little patience and a tripod. The reason you see few alpine night time shots is that any sensible person would be fast asleep for that early morning alpine start the next day. I often set an alarm for some early hour of the morning so i can emerge from my cocoon and take some shots before retreating back into the confines of my bivi bag and passing out for the next couple of hours. I sleep with my camera in my bag which keeps it warm and as long as you have your tripod by your side you can just erect it over your bivi bag and just sit up and take a few photos…cant get easier than that?
Unfortunately those using compacts are going to struggle here as this is where having an SLR and good lens combo really helps. But these tips should steer you in the right direction:
- Try and use a low ISO as possible as noise can be very bad in the darker areas on a long exposure
- If in doubt always over expose the image. You can easily darken it later in photo software but the reverse is often hard as you will accentuate any noise in the image heavily.
- Think about the shot you are taking- even though you may be able to see the shadow detail, chances are that the image isnt going to pick that up so try and shoot stuff that is as lit up as possible
- Be aware that you are going to be shooting with a very wide aperature to allow the maximum amount of light in. As discussed in a previous article this will lower your depth of field meaning that if you are focusing in on a close foreground, your background is going to be out of focus. Therefore, as a starter, try and avoid shooting complex scenes and aim for simple landscapes in the distance.
- Avoid using your flash — it just makes the foreground look bleached and unnatural (you will get a circle of white snow for example in front of you). If you do want people in the image just get them to stand still and shine your headtorch on them.
- Use your timer function — it will avoid you moving the camera when pressing the shutter release button
- Check out the lunar calendar — I tend to only shoot around full moon time as this allows me to shoot with a 30sec exposure. anything more and the image tends to get ruined by a gust of wind or something
- Experiment, experiment, experiment! This is a totally different type of photography but a very rewarding one- all you need is patience on this one
The Macro in the Mountains

Photo of an ice shard and air bubbles trapped in ice
This is about as ‘arty’ as I get. I do very little macro in the mountains as I tend to like the ‘bigger picture’ but nevertheless it can provide some fun quirky shots that others will have missed- or sometimes just stepped on! These two images are taken at different times but are essentially the same shot. The Ice shard on the left was taken as ice was rapidly forming across a glacial meltpool, and the image on the right is basically an effect of instant winter cooling of water on a glacial ice sheet trapping the air instantly.
There is a common misconception that you need a very big lens to take macro. These two shots were taken on my first ever non-kit lens which was a relatively cheap sigma lens (and they are pin sharp even when printed out at A2). The key is to not get up close but the exact opposite- use the maximum telephoto available and zoom into your subject. Obviously a tripod is often very useful here as camera shake on a long telephoto can be bad, however I took these in the fading light on Velvia 100 (slow film), both handheld at 200mm. It’s amazing how still you can be if you want to be and thats something worth remembering. Dont instantly snap away just relax, get yourself into a stable and comfortable stance and breathe…then time your shots in time with your breathing so that as you pause between breaths you take the shot.
- Think about your aperature here, it can make a big difference. Remember that a small F stop (eg F4) will effectively blur out the area around the subject matter; whilst a larger F stop will extend the focused area so that more of the background or foregound is in focus. For example the image on the left is shot at F4 to allow only the ice shard to be in focus or else it would have just merged in with the background.
- Dont get too carried away here sometimes something which may look interesting to you close up will look plain boring. Look for patterns as these are an easy one to create interest in an photograph. I was guilty of getting carried away on the ‘arty’ wave and spent 2 days just taking macro shots around Zermatt, and they were all rubbish…plain, boring, lack of colour- just terrible! So dont just point your camera down at the floor for your whole trip, remember the mountains are full of beauty even if they can be cheesy shots!
The Spur of the Moment shots

Photo of an avalanche thundering down the Mont Blanc du Tacul
The thing I wanted to see most when I first came climbing in the Alps wasnt the Matterhorn, or the Mont Blanc but an avalanche. The kind of cataclysmic event that makes you feel giddy inside as you watch mother nature unleash hell for a minute before everything returns back to normal as if nothing had happened. I was absolutely fascinated by the power and beauty of it- the trick was to see one without actually being caught in it. There are of course good reasons why you dont see avlanches that much. The first is that you dont tend to be about when there is a high risk, the other reason is that they arent always easy to spot- whilst you may hear it first, it can take a while to locate the avalanche. When you consider this, adn the fact that they can travel upwards of 250km/h it seems therefore very improbable that you are going to see a large one and have time to get your camera out to get some good shots.
To get spur of the moment shots you need to have your camera out at all times. If you have a compact then thats easy as you just leave it in your pocket. However anSLR is more of a pain and having it strapped to your hip belt is not only cumbersome but sometimes a real danger when you find yourself chimneying up some mixed route with your camera getting in the way. Unfortunately there is no other choice. I know that I can have my camera up and shooting within a matter of seconds without having to take my backpack off. It also means that I can start belaying my partner immediately on a autolock device and get my camera out and take shots- by the time he reaches me it is already away and I am ready to belay him. It also means that when you see a spur of the moment event such as an avalanche, whilst your mate is still fumbling about in his pack for his camera you’ve already got 10 amazing shots and are putting yours away.
- Keep your camera in an easily accessible place on your person
- Make sure it is on the setting that you want and save them so you can just instantly start shooting away
- Be quick, dont hesitate with “Can I be bothered?” just get it out and take a photo — it’s only a couple of seconds of your life and those shots will generally always be a great personal reminder even if they arent amazing images.
Hanging off a rope for a day
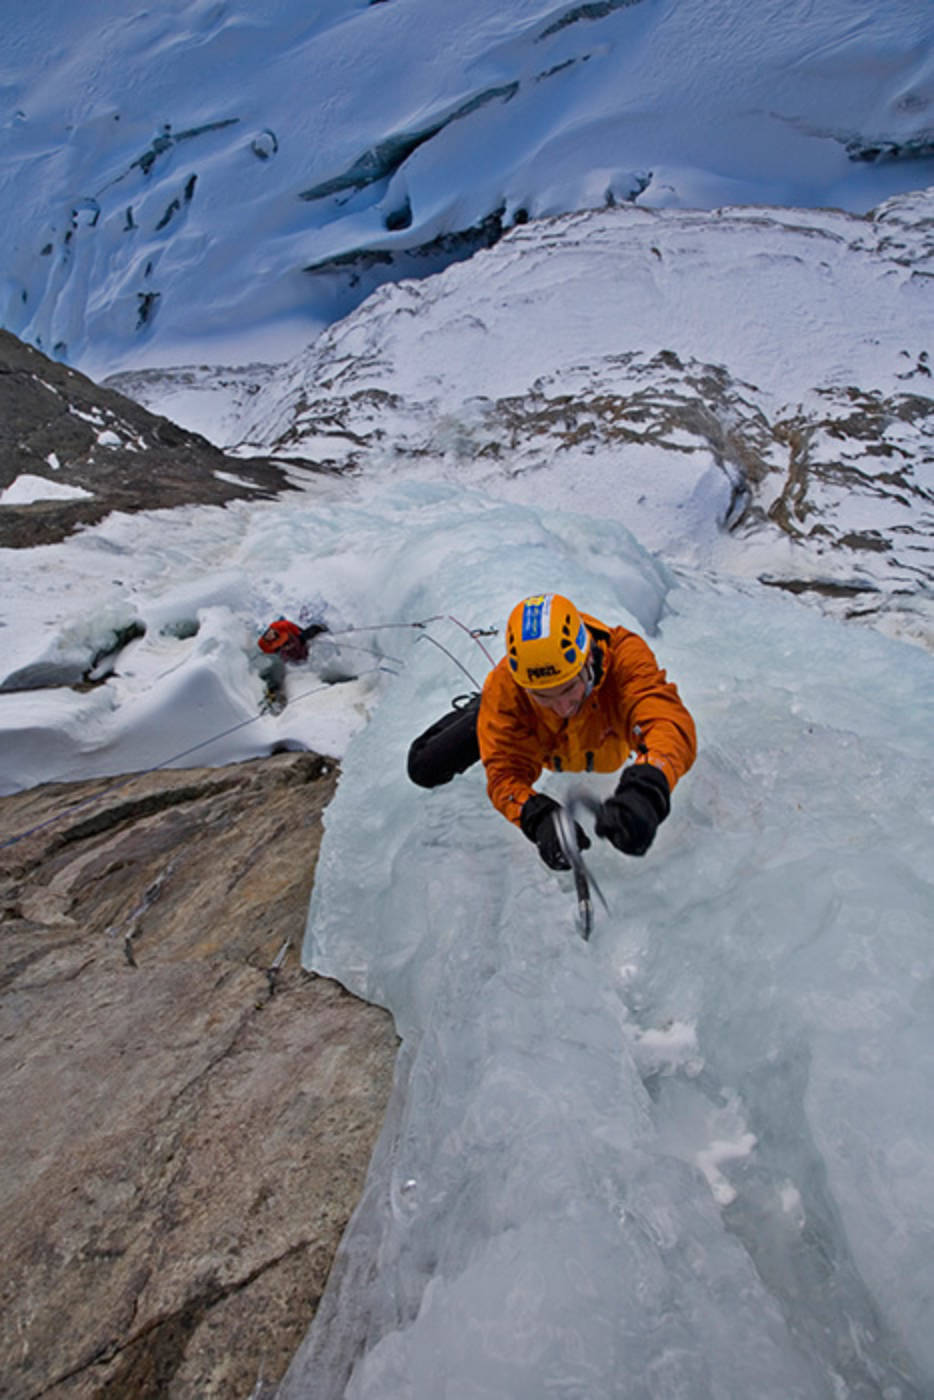
Kenton Cool leading the final pitch of Nuit Blanche
Ok not the most exciting day for you as the camera man but it’s a sure fire was to get incredible shots of your mates climbing. If you can get to the top of the crag then a top rope is the easiest way. Some kind of mechanical device is recommended here as prussiking up 50m of rope is incredibly tiring and slow and chances are your mates will be climbing faster than you are. The last time I was out I used a ropeman and a Gri Gri- not the most efficient way but it can be done without buying jumar devices. If you are two rope teams then you can at least get a climb in. Just make sure that you stop near the top of the pitch when seconding to allow the leader on the rope below to climb up to you. This will mean crowded belays and you will move much slower but if its a short climb and you want a climb, and your mates want some descent photos, it’s a good compromise.
- If you have a static line that’s even better
- Make sure you are very well anchored as you are going to be putting quite alot of strain on the rope for a long time (ie dont just rely on a couple of ice screws as they might pop out if under pressure for a few hours)
- Try not to get in the way of your mates climbing- it’s easy to do as the close up wide angle shot is great for showing exposure, but it wont get you any free beers that night!
- It’s important to get as far out from the wall as possible. Sometimes these shots can be a little disappopinting as they dont show the true steepness of the wall. However the more you can get the camera away from the wall (ie as if taking a shot from behind the climber) the better it will be. You can get a tripod for this and extend it out with its legs against the rock/ice and the attachment part somewhere in your stomach- this will push you out further than your legs can.
- Bring pro so you can move about and anchor yourself to the face- you might want to change sides of the climber depending on the pitch but whilst penduluming across might be ok you want to make sure that you dont lose your footing and pendulum back into the lead climber
- Watch out for you rope in the shot. It’s very easy, especialy on a wide angle, to get your foot or you rope in the shot somewhere. When you find a good spot pull your rope up and drape it over your foot or even higher if it’s still in the way.
- Dress up warm as it can get very cold (and wet on ice) just sitting on a rope; and a comfortable harness is also a good idea
Stitched Panoramas

Winter sunrise over the Vallee Blanche, 2 alpinists on the RHS
I only really got into doing stitched panoramas last year. It’s actually very easy if you have some of the more powerful photo software programs. Mind you there are plenty of free Panoramic stitching programs out there also. The fantastic thing about them is the kind of high resolution you can then extract into a photo. I tend to take 3 shots and stitch them together as a maximum or else the image just ends up being this pencil thin letter box type image. Dont get carried away either as stitching together 10 photos is actually a very complex job which will normally result in some visual error on the way. If you keep it nice and simple then it wont go wrong- plus you wont be juggling with 1GB files. There are a few tips though that will help you get it right:
- The hardest part of taking these shots is trying to get everything in. In the mountains you are going to have one peak that will be visually higher than everything else. By incorporating this fully into the shot you may find that there is alot of blue sky due to the fact that you had to ‘aim high’ to get the mountain in. It’s an easy mistake to make and one that wont look good. Instead remember the rule of thirds and if you find that there is too much blue sky just ignore the highest peak and chop it off. Make sure you chop a sizeable bit off or else it will look like a mistake
- Using a tripod makes the whole affair easier but I have found that a stitch of 3 shots maximum is perfectly easy to do hand held. Just make sure you let the images overlap by a quarter to a third and watch the horizon. when you move your body round to take the next shot make a quick check to ensure that the horizon is still straight
- Start with your highest visual point. I tend to leave the smallest possible amount of sky above this point due to the first comment I made and then start panning around.
- Maybe the most important point is to make sure that you have everything pre-focused and both the aperture and shutter speed dont change between shots. If you leave your finger half depressed on the shutter release button (on a digital compact /slr) this normally allows you to take multiple shots without the settings re-adjusting. If you dont do this then your images will not be able to align properly and you will get light and dark areas of sky where the photos match up.


